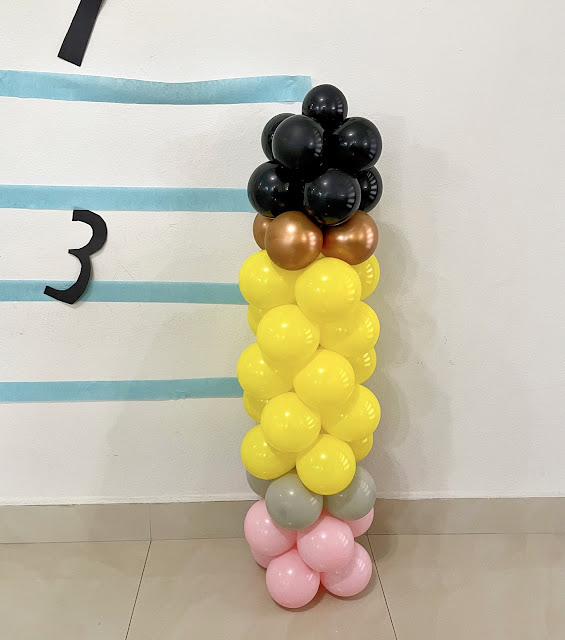
DIY Small Balloon Pencil
What you'll need:
- 8 pink balloons for the eraser part
- 4 gray or silver balloons for the metal part
- 20 yellow balloons for the main body of the pencil
- 4 beige (chrome works too) balloons for the wooden part of the tip
- 9 black balloons for the lead part of the tip
- 1 260 type balloon of any color
- Hand-held Air Balloon pump
How to put together your balloon pencil:
Start by inflating all the balloons. This will make it a lot easier to put the balloon pencil together.
- Inflate all pink, gray, and yellow balloons to 3 pumps
- Inflate beige balloons to 2 pumps
- Inflate 4 black balloons to 2 pumps
- Inflate 4 black balloons to 1.5 pumps
- Inflate 1 black balloon to 1 pump
Next, you'll tie the balloons in sets of 4 or quartets. First, tie two sets of pink balloons together to form duplets and twist the duplets together to form a quartet. Repeat this with all the pink, gray, and yellow balloons. Make quartets of the smaller beige and black balloons as well. Leave the smallest black balloon to be the tip of the pencil.
Next, tie all the quartets together using the 260 balloon. Start by tying the 260 in a knot around one pink quartet. Place the second quartet on top so that the balloons in the second set are nestled in the space between balloons in the first (bottom) set. Pull the 260 up while pushing the middle of the quartet down. This will prevent the 260 from showing in between quartets.Twist the 260 in succession around two of quartet's balloons to secure it in place. Repeat this process with all the quartets in order. Tie the smallest black balloon to the 260 at the top to finish the pencil.
Your balloon pencil is done! You can tie a small water balloon, as a weight, at the pink eraser end to stand your pencil upright. Or you can leave it without a weight for the kids (and adults!) to play with using a giant wall notebook backdrop.
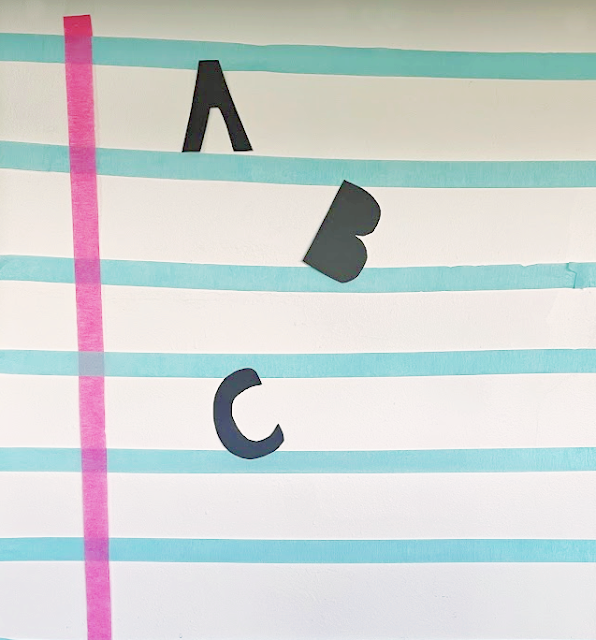
Notebook Backdrop for Back to School Party
Materials:
- Crepe paper rolls in pink and turquoise or light blue
- Scissors
- Double-sided tape or regular packing tape
- Black cardstock
Step 2: Use double-sided tape or packing tape to attach the crepe paper lines to the wall to create the appearance of notebook pages. Make sure to press firmly to ensure it sticks securely.
Step 3: With black cardstock draw the letters ABC and the numbers 123 to add anywhere you like on your notebook pages.
Step 4: Personalize (Optional) -You can also add "Welcome Back!" or any other back-to-school message at the top of the backdrop.
Complete the party atmosphere by decorating around the notebook backdrop with colorful balloons, streamers, and back-to-school-themed decorations.
Your DIY Notebook Backdrop is now ready to impress your kids at the Back-to-School Party! It will be a delightful and charming addition to your celebration, creating the perfect backdrop for photo opportunities and setting the mood for a fun-filled event.
Have a fantastic party, and may this creative backdrop inspire everyone to embark on an exciting and successful school year ahead!

.png)


.png)
%20(1).jpg)
